
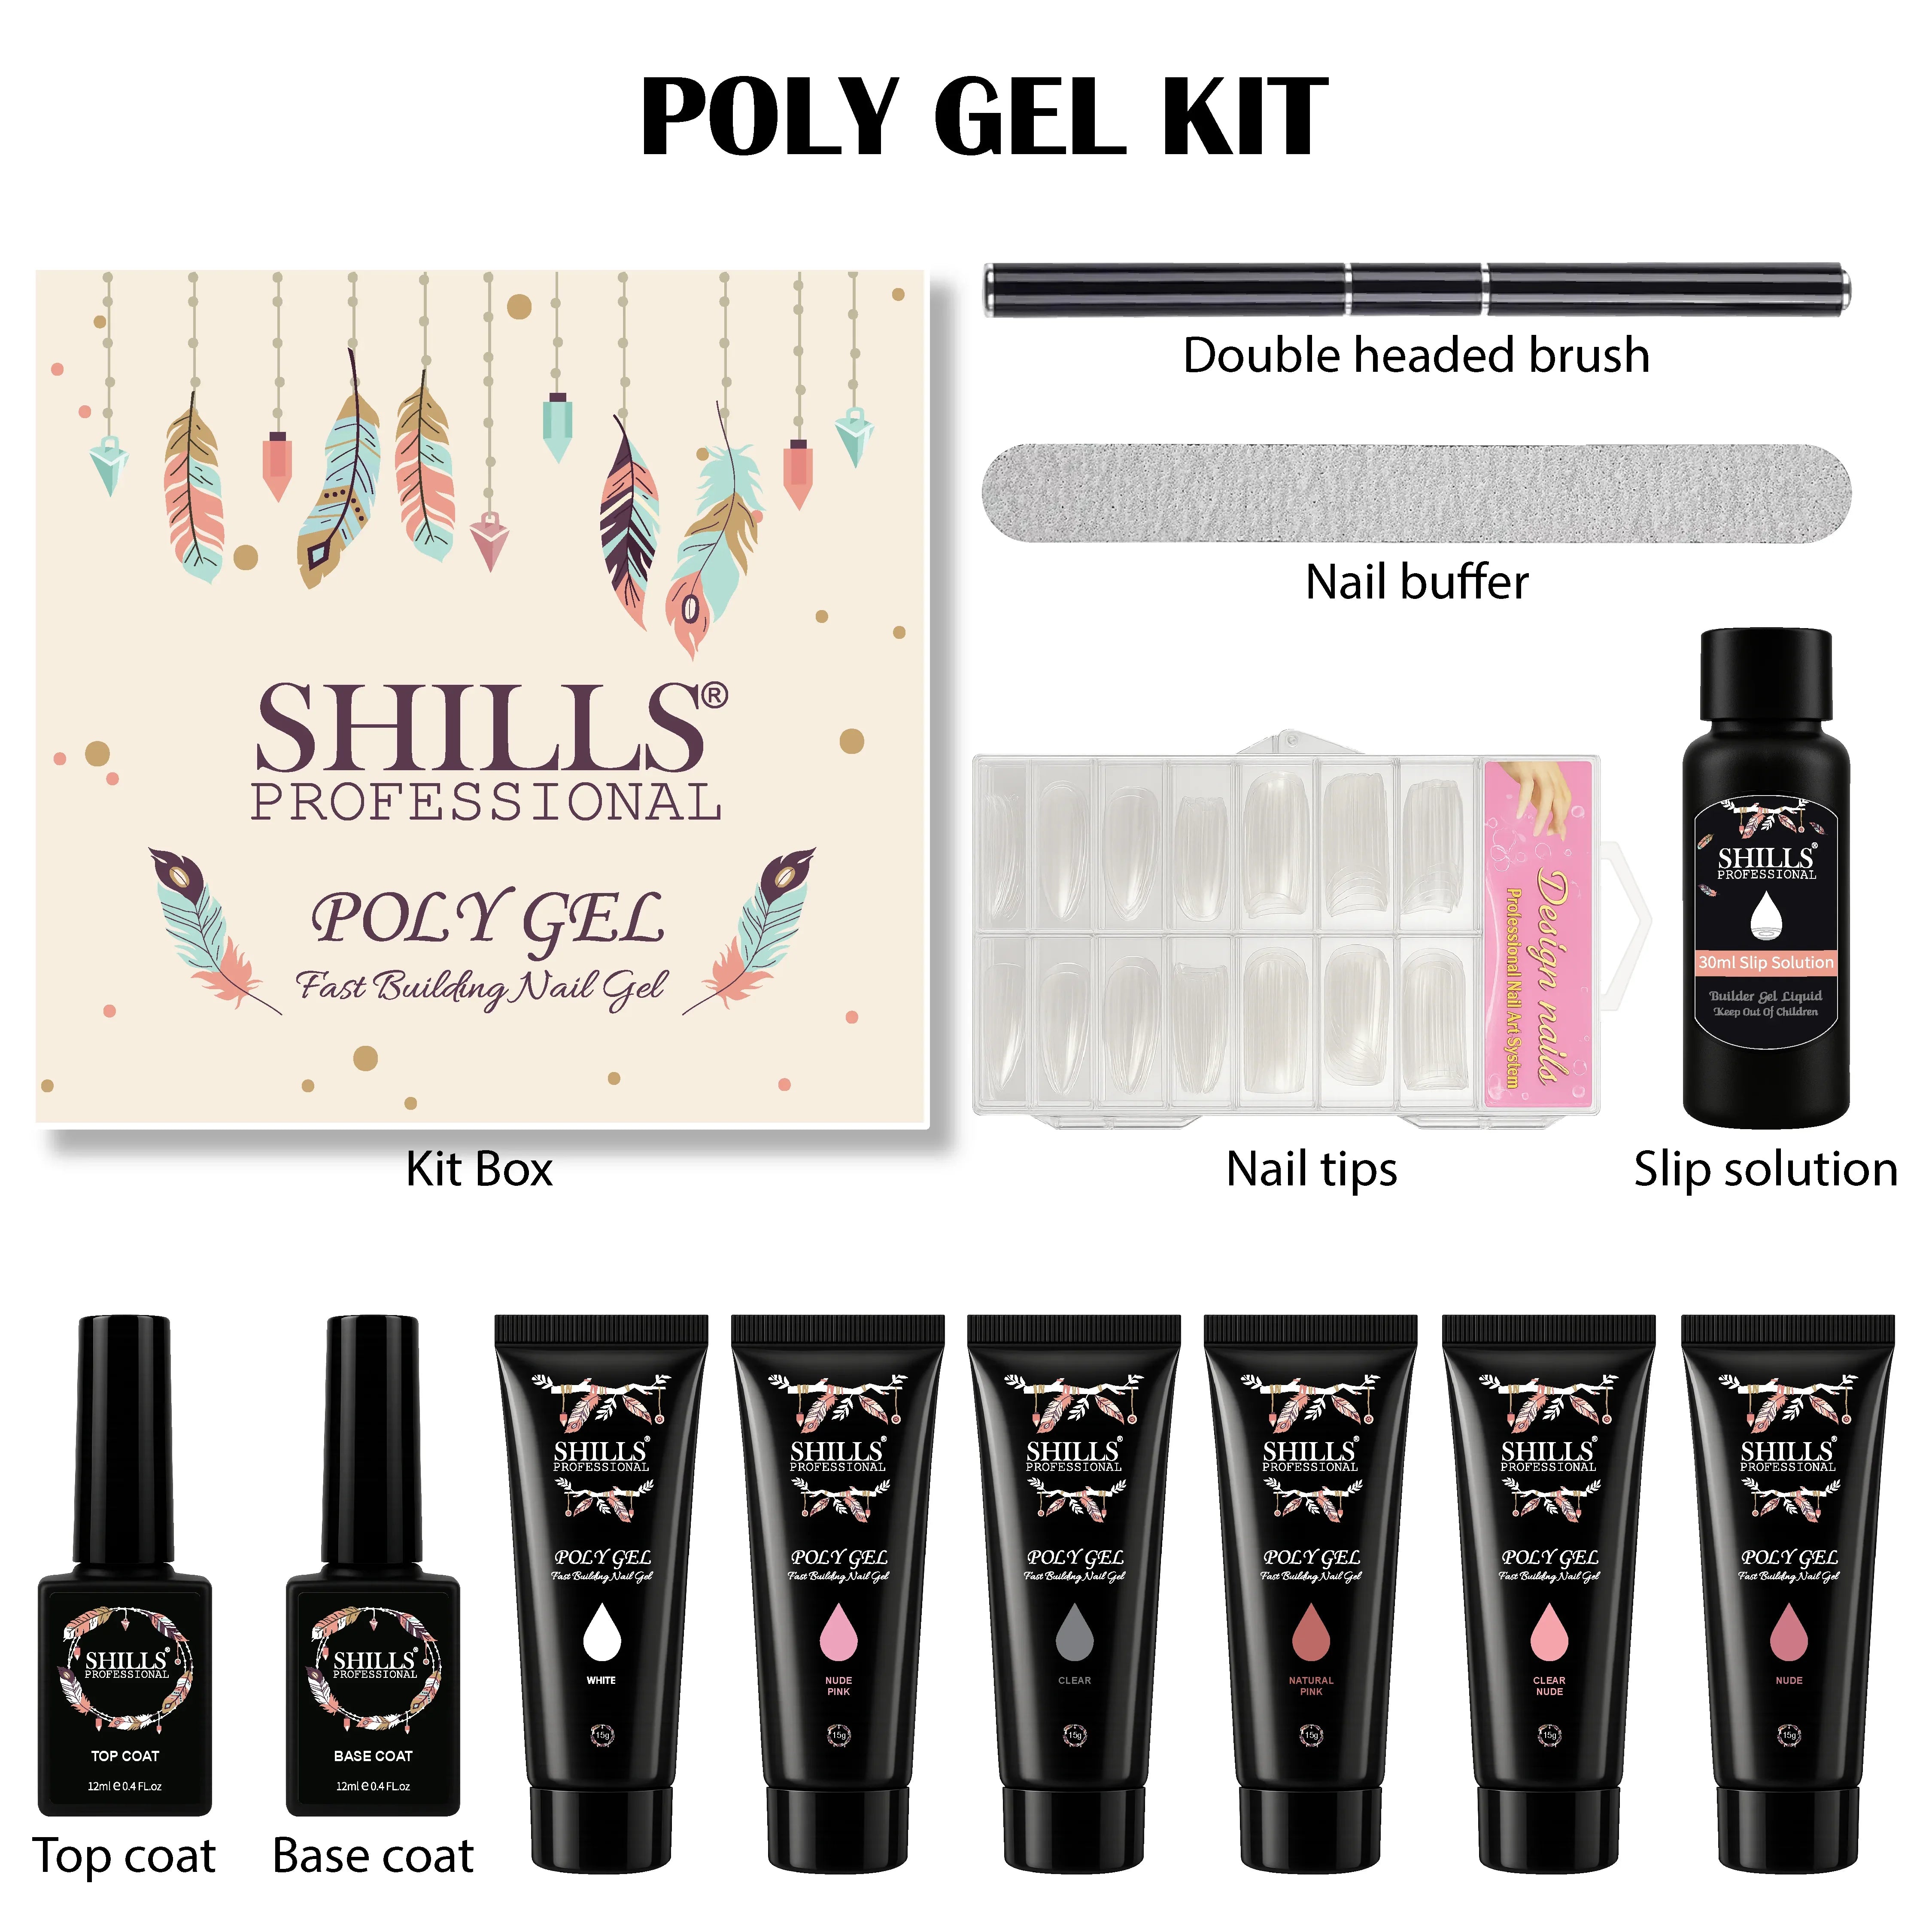


Poly Gel Kit
MRP inclusive of all taxes
5% Off for New Customers
Use Code: FIRST5
Secure
Payment
COD
Available
Description
Shills Professional Poly Gel Kit is a versatile professional nail enhancement system designed for creating structured overlays, customized nail extensions, reinforced manicures, and sculpted nail shapes with greater control during product placement. Combining the moldable working characteristics associated with professional nail enhancement products with UV/LED curing, Poly Gel gives nail technicians time to shape and refine the product before it is permanently cured.
Unlike conventional gel polish, which is primarily designed to provide color, Poly Gel is a structural enhancement material. It can be used to build length, reinforce suitable natural nails, create an apex, correct surface architecture, and form customized artificial nail shapes according to professional technique.
One of the major advantages of Poly Gel is its workable consistency. The material remains moldable during application rather than immediately hardening in open air. This allows technicians to position, spread, smooth, and shape the product before placing it under a compatible UV/LED nail lamp.
The controlled consistency also makes Poly Gel useful for technicians who want greater placement control while building nail architecture. Product can be concentrated around the appropriate stress area, refined toward the sidewalls and free edge, and shaped into the desired extension profile before curing.
Depending on the professional technique and compatible products being used, Poly Gel can support natural nail overlays, sculpted extensions, dual-form applications, tip-based enhancements, repairs, and reinforcement services.
For natural nail overlays, Poly Gel can add structural support without necessarily creating substantial additional length. This makes it suitable for clients who want to maintain their natural nails while benefiting from a more structured enhancement.
For extensions, Poly Gel can be shaped using compatible nail forms, dual forms, or another appropriate professional extension method. Technicians can customize the length and finished silhouette rather than being limited to one pre-manufactured nail shape.
After curing, the enhancement can be refined with an appropriate professional nail file or trained electric-file technique. The finished structure can then remain in its selected Poly Gel appearance or be transformed with compatible gel polish, French detailing, glitter, chrome, cat-eye effects, Painting Color Gel, rhinestones, crystals, decals, and other professional nail art.
Because this product is described as a Poly Gel Kit, it provides a convenient starting system for professional enhancement services. However, the exact included components should always be confirmed from the individual kit packaging rather than assumed from the product name.
Whether creating reinforced natural nails, salon extensions, French enhancements, bridal manicures, sculpted nail shapes, or elaborate decorative sets, Poly Gel Kit provides nail professionals with a versatile structural system combining controlled application, customizable architecture, UV/LED curing, and extensive creative possibilities.
Key Features
Professional Poly Gel Enhancement System: Designed for structured nail overlays and compatible extension techniques.
Moldable Working Consistency: Allows technicians to position and shape the material before curing.
UV/LED Curable: Hardens under a compatible professional nail lamp according to the product instructions.
Suitable for Nail Extensions: Can be used to create customized extension length using an appropriate professional technique.
Natural Nail Overlays: Useful for reinforcing suitable natural nails without necessarily adding substantial length.
Apex Construction: Allows technicians to build appropriate nail architecture and stress-area support.
Surface Leveling: Can help create a smoother, more balanced enhancement surface through controlled product placement.
Customizable Nail Shapes: Suitable for creating square, oval, almond, ballet, and other compatible professional shapes.
Dual-Form Compatibility: Can be incorporated into compatible dual-form extension techniques where appropriate.
Sculpting Possibilities: Suitable for professional form-based extension construction where supported by the system.
Fileable After Curing: The cured enhancement can be refined using appropriate professional filing techniques.
Creative Nail-Art Foundation: Can be covered with compatible gel polish, chrome, glitter, cat-eye gel, French designs, and embellishments.
Professional & Training Use: Suitable for nail salons, trained technicians, beauty academies, and experienced nail students.
How To Use
Step 1 – Prepare the Natural Nails
Begin with clean and completely dry nails.
Remove existing nail products where required.
Gently push back the cuticles and remove appropriate non-living tissue from the nail plate.
Step 2 – Shape the Natural Free Edge
Use an appropriate professional nail file to create the desired shape.
Step 3 – Prepare the Nail Surface
Gently remove surface shine according to the Poly Gel system.
Avoid aggressive filing or unnecessarily thinning the natural nail.
Step 4 – Remove Nail Dust
Use an appropriate nail dusting brush to remove loose filing residue.
Perform any additional cleansing required by the system.
Step 5 – Apply Preparation Products
Apply compatible dehydrator, primer, bonder, or other preparation products where required.
Follow each product's individual instructions.
Step 6 – Apply Base or Bonding Gel
If the Poly Gel system requires a separate Base Coat or bonding layer, apply a thin controlled coat.
Cure according to its instructions.
Step 7 – Dispense the Poly Gel
Place an appropriate amount of Poly Gel onto the nail.
Start with a controlled quantity rather than excessive product.
Step 8 – Shape the Product
Using an appropriate Poly Gel brush or spatula system, guide the material across the nail.
If the system uses a compatible slip solution, use only the amount required to help manipulate the product.
Step 9 – Keep the Cuticle Area Controlled
Maintain a neat margin around the cuticle and sidewalls.
Do not allow uncured Poly Gel to remain on surrounding skin.
Step 10 – Build the Apex
Concentrate the appropriate amount of product around the stress area while keeping the cuticle region and free-edge transition balanced.
Step 11 – Check the Structure
View the nail from above, the side, and the front.
Make adjustments before curing.
Step 12 – Cure
Cure under a compatible UV/LED nail lamp according to the Poly Gel instructions.
Step 13 – Clean if Required
If the cured product leaves an inhibition layer and filing is required, follow the appropriate cleansing procedure.
Step 14 – File and Refine
Refine the sidewalls, free edge, surface, and overall architecture using an appropriate professional nail file or trained e-file technique.
Step 15 – Remove Dust
Thoroughly remove all filing residue.
Step 16 – Apply Color or Nail Art
Apply compatible gel polish, French detailing, chrome, glitter, cat-eye gel, rhinestones, or other nail art.
Step 17 – Finish
Apply a compatible Top Coat and cure according to its instructions.


